Загрузка, установка и авторизация sketchup
Содержание:
- Managing extensions in the Extension Warehouse or within SketchUp
- Installing extensions manually in SketchUp
- Installing extensions manually in SketchUp
- Repositioning textures
- В заключении
- Интерфейс программы
- Managing extensions in the Extension Warehouse or within SketchUp
- Scaling a selection proportionally
- Editing all instances of a component
- Первый запуск Скетчап
- Пропорциональное масштабирование выборки
- Understanding how SketchUp for Web features work differently from the desktop version of SketchUp
- Обзор интерфейса SketchUp
- Finding and using an extension after it’s installed
- Stretching or squishing geometry to scale
- How to Install Sketchup Plugins
- Trying or purchasing extensions in the Extension Warehouse
- Replacing one material with another
- Opening from and downloading to your computer
- Applying materials
Managing extensions in the Extension Warehouse or within SketchUp
You can manage extensions in the Extension Warehouse on the My Extensions page. Also, within your copy of SketchUp, the Extension Manager enables you to manage your extensions and offers a few features that control how your copy of SketchUp works with your extensions.
The following table outlines what extension-management features you find on the Extension Warehouse My Extensions page (online) and what features you can control in Extension Manager.
Tip: Extension Manager communicates with the online My Extensions page so that your extensions are managed seamlessly.
| Feature | My Extensions Page (Online) | Extension Manager |
|---|---|---|
| Update extensions | ||
| Enable or disable extensions | ||
| Install or uninstall extensions | ||
| Remove extensions | ||
| View signature status | ||
| Select loading policy |
Installing extensions manually in SketchUp
If you download an extension from the Extension Warehouse via a web browser or from a developer’s website, your extension is packaged as an file that you can install manually. Here are the steps you need to follow:
- In SketchUp, select Extensions > Extension Manager. The Extension Manager window appears.
- Click the Install Extension button.
- In the Open dialog box that appears, navigate to the file saved to your computer, select the file, and click OK (Microsoft Windows) or Open (Mac OS X).
- When SketchUp warns you about installing only extensions from trusted sources, click Yes to proceed and install your extension. (This assumes you do, in fact, trust the source of your extension.)
Repositioning textures
After you apply a texture to one or more faces in a 3D model, you can adjust how the texture tiles across a face. To do so, you use the Position Texture tool, which has two modes:
- Fixed Pin mode: In this mode, you can move, rotate, scale, or distort a texture. For example, in this mode, you can adjust a texture on one face so that it lines up with the same texture on another face, such as siding on two faces of a building.
- Free Pin mode: If you need to stretch or shrink a texture, use Free Pin mode.
Here’s how to adjust a texture in Fixed Pin mode:
- Context-click the material and select Texture > Position from the menu that appears. You see a matrix of dotted lines that represents the texture’s individual tiles. The cursor also changes to a hand and four pins are displayed.
- If you see the four colored pins, as shown in the following figure, move to the next step. If you don’t, context-click the material and select Fixed Pins.
- Use the hand cursor and/or the pins to adjust your texture. In this example, the goal is to move the green pin so that the direction of the wood on the top of the cabinet matches the side. Here’s a quick rundown of all your options:
- Click and drag the material with the hand cursor to reposition the texture as a whole.
- Click a pin to pick it up and click again to drop the pin elsewhere on the texture.
- Drag a pin to alter the texture. Dragging the blue pin scales or shears the texture. Dragging the yellow pin distorts the texture. Dragging the green pin scales the texture or rotates it around the Move pin’s axis. Dragging the red pin, which is the move pin, moves the texture.
Tip: In Fixed Pin mode, you can also context-click the texture to see additional options: flip the texture to the left or right or up or down, rotate the texture in increments of 90 degrees. The reset option reverts the texture to its original state, whereas the Undo option simply undoes the last command. If you undo an action, Redo also becomes an option.
- When you’re finished changing the texture, context-click the texture and select Done. Or just click outside the texture to exit Fixed Pin mode.
In Free Pin mode, you can set the size of your texture tile relative to your model. Here’s how the process works:
- Context-click the material and select Texture > Position from the menu that appears. By default, you’re in Fixed Pin mode.
- Switch to Free Pin mode by context-clicking the texture and clearing the Fixed Pins option. In Free Pin mode, you see four white pins, as shown in the following figure.
- Click a pin to pick it up and click again to place the pin in its new location. Do this for all four pins to set where the corners of the texture tile appear. If you place the pins in a configuration that isn’t rectangular, you distort the texture.
- When you’re finished, context-click the texture and select Done. Or simply click outside the texture to exit Free Pin mode.
Tip: In Free Pin mode, you see the size of the texture tile only on the selected face. To change the size of your texture tile throughout your model, use the Materials panel (Microsoft Windows) or the Colors panel (macOS). See the earlier section, , for details.
В заключении
Проектирование и сборка мебели самому — это экономия денег где-то в 2 раза. А также возможность втиснуть ваше индивидуальное мебельное изделие в любую нестандартную дырку в квартире. Я обычно собираю мебель на конфирматах 7×50 из ЛДСП 16 мм
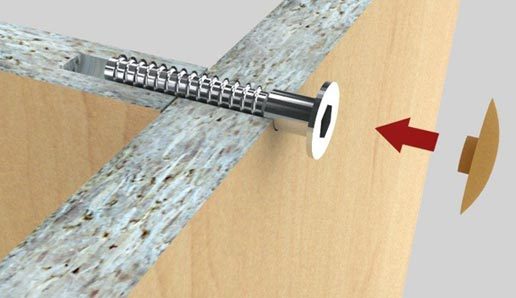
При наличии сверла для конфирматов
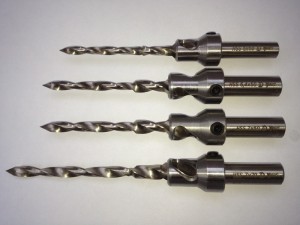
(и небольшого навыка) сборка занимает не так много времени.
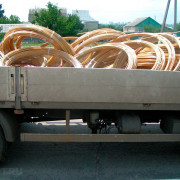
Единственный минус — в это можно втянуться. После рабочего стола я уже собрал: кухню, несколько клеток (для одной и той же птицы она на фото), полки (навесные и напольные), тумбы и столы. В общем «захламил» в квартире все неиспользуемые места.
Ссылка на страницу плагина
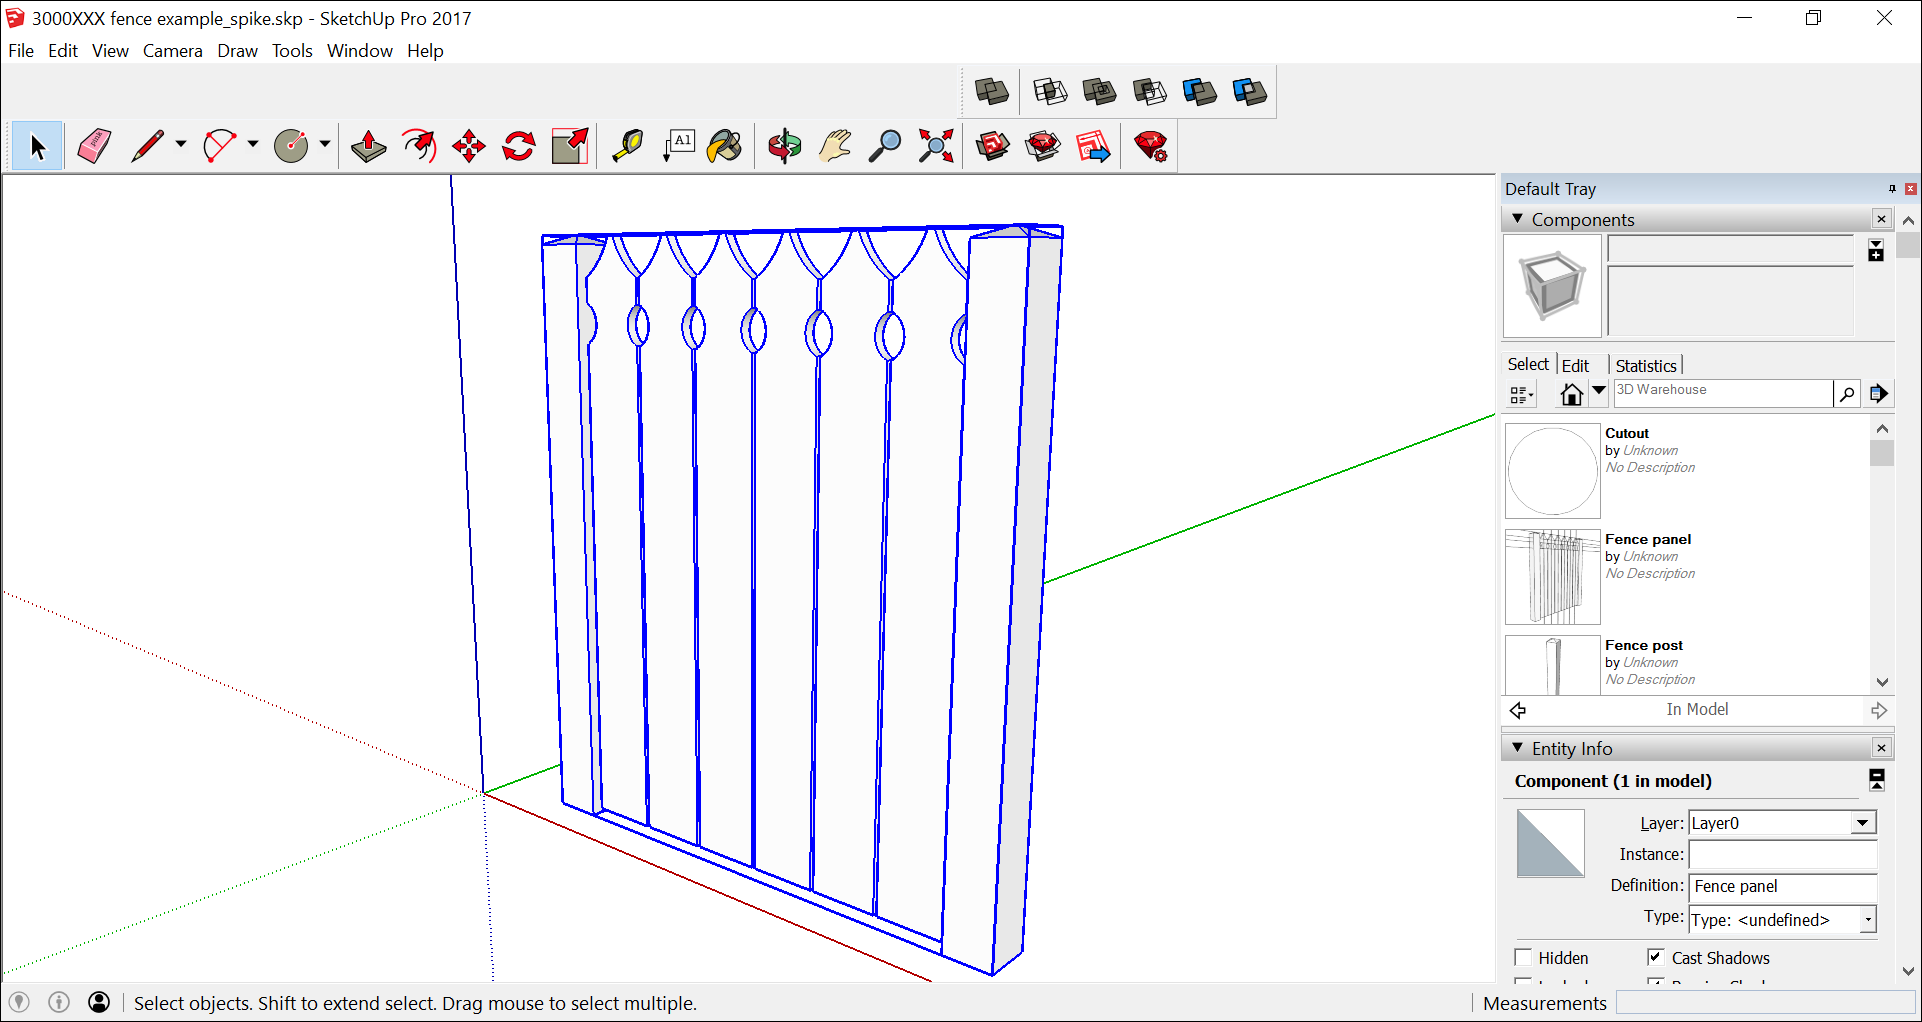
Интерфейс программы
Всего интерфейс программы можно разделить на две главные области: рабочую и место, предназначенное для расположения панелей инструментов и дополнительных вкладок. Так, сверху и вокруг рабочей области располагаются меню и выбранные панели инструментов, по центру — рабочее пространство, слева — окно для быстрой работы со слоями, стилями и другими компонентами.
Чем больше панелей инструментов, тем меньше будет пространство для проектирования.
Верхнее меню состоит из нескольких вкладок:
- Файл. Для создания, открытия и сохранения проектов, других файлов. Здесь же можно настроить параметры для печати, добавить географическое местоположение объекта, экспортировать или импортировать модели для просмотра на Андроид или другом устройстве.
- Изменить. Позволяет осуществлять простейшие действия для редактирования. В том числе, копировать, отменить, вставить, показать, выбрать все. Здесь же можно объединять созданные элементы в группы для более удобного проектирования.
- Вид. Доступ к настройкам панелей инструментов. Активация отображения теней, дымки. Можно выбрать один из доступных стилей для граней, краев, создать анимацию.
- Камера. Необходима для удобного управления видом рабочей области. Есть такие инструменты, как масштаб, вращение и панорама. При необходимости можно расположить камеру в определенном месте, чтобы получить удобный угол обзора.
- Нарисовать. Доступ к инструментам для рисования, создания линий. Здесь же можно создать геометрическую фигуру или воспользоваться инструментом для рисования дуг по 2 или 3 точкам, секторам.
- Инструменты. Перечень доступных для моделирования инструментов.
- Окно. Для редактирования основных компонентов, которые будут отображаться во вкладке справа. Здесь же можно включить консоль для написания программного кода на языке Ruby.
- Справка. Для получения дополнительной информации касательно программного обеспечения.
Для того, чтобы скрыть или показать вкладку «Лоток» в правой части экрана достаточно перейти в меню «Окно» — «Лоток по умолчанию» и выбрать нужную опцию.
Managing extensions in the Extension Warehouse or within SketchUp
You can manage extensions in the Extension Warehouse on the My Extensions page. Also, within your copy of SketchUp, the Extension Manager enables you to manage your extensions and offers a few features that control how your copy of SketchUp works with your extensions.
The following table outlines what extension-management features you find on the Extension Warehouse My Extensions page (online) and what features you can control in Extension Manager.
Tip: Extension Manager communicates with the online My Extensions page so that your extensions are managed seamlessly.
| Feature | My Extensions Page (Online) | Extension Manager |
|---|---|---|
| Update extensions | ||
| Enable or disable extensions | ||
| Install or uninstall extensions | ||
| Remove extensions | ||
| View signature status | ||
| Select loading policy |
Scaling a selection proportionally
When you want to resize geometry within your model and maintain its proportions, you can use either the Tape Measure tool or the Scale tool. Your choice depends on how you want to set the scale:
- To base the scale on the size of a specific line, use the Tape Measure. For example, you find out one room in your floor plan can only be 10 feet wide, but the rest of the floor plan can stay the same. Or you know a statue must be 3 meters tall.
- To resize your selection based on a percentage of your original size, use the Scale tool. For example, choose this method if you want to increase your selection’s size by 200% or decrease it to 50%.
To scale part of your model with the Tape Measure, follow these steps:
- With the Select tool (), select the entities you want to scale.
- Context-click your selection and, from the context menu that appears, select Make Group.
- Double-click the group. A box of dashed lines appears around the group, indicating that you’ve opened the group, as shown in the figure.
- Select the Tape Measure tool () or press the T key.
- Click one end point of your reference line. Use the SketchUp inference engine to make sure you click the exact end point.
- Click the other end point of your reference line. The current distance appears in the Measurements box, as shown in the figure. In the example, say you need to decrease this width to 10 feet, due to issues on the site where the floor plan will be built.
- Type a new size for the line (in this example, you type 10′) and press the Enter key. This size will be used as the basis for a proportional rescale of your model. SketchUp asks whether you want to resize your group or component.
- Click the Yes button, and your selection rescaled proportionally. Check out the result in the following figure. That’s a much smaller room.
Note: This process also works with components. See Adding Premade Components and Dynamic Components for an introduction to components. The section later in this article explains how scaling only affects a single component or all component instances in a model.
When you want to scale your model proportionally by a percentage, the Scale tool can do the job easily. Imagine you’re not sure how to talk to your client about decreasing a room in their floor plan to 10 feet wide, so you model an elephant in the room while you think it over. Here’s how to scale that elephant, or any other selection in your model, by a percentage:
- With the Select tool (), select the geometry you want to scale. This step is important if you want to scale a complex 3D selection. If you have an easy selection, like a 2D shape or a surface entity, you can skip this step.
- Select the Scale tool () or press the S key. A yellow box with green grips appears around your selection, as shown in the figure. If you skipped Step 1, click the geometry with the Scale tool cursor.
- For a uniform scaling, or one that keeps your selection proportional, click a corner scaling grip. The selected grip and the opposite scaling grip turn red, as shown in the following figure, and in the Measurements box, you see a scale of 1.00, which means your geometry is at its original size, or scaled to 100%.Alternatively, you can tap Shift to toggle Scale Uniformly which will prevent the Scale operation from deforming the geometry.
- Move the cursor to scale the entity. The Measurements box displays the scale dynamically. Press the Esc key at any point to start over. To set the scale from the center instead of the opposite corner, tap the Ctrl key (Windows) or the Option key (macOS) to toggle this functionality while you move the red corner grip.
- Click to set your selection’s new scale. Or type the desired scale dimensions and press Enter.
Note: Technically, in Step 5, you can type a dimension, such as 2m or 3″, instead of a scale dimension. However, scaling based on a dimension with the Tape Measure is generally more intuitive.
Editing all instances of a component
To edit all instances of a component, follow these steps:
- Open the context for the component you want to edit. In this example, that’s the Picket component. To open the context, you can double-click the component. Or select it, context-click the selection, and choose Edit Component, or simply hit Enter.
- Use the SketchUp drawing tools to edit your component. In this example, we used the Line, Tape Measure, 2 Point Arc, and Push/Pull tool to change the top of the Picket component. All component instances change as you draw.
- Click outside the component’s context and save your work. SketchUp automatically updates the component definition to reflect your edits.
Первый запуск Скетчап
Поставляется приложение Гугл Скетчап на русском, поэтому русификатор скачивать не придется. На данном этапе нас интересует сам редактор, то есть приложение SketchUp Pro, а не два других его компонента. Поэтому запускать нужно именно его.
При первом запуске появится окно приветствия с тремя основными вкладками:
- Изучение. Для работы с онлайн сервисами для знакомства с приложением. Необходимо подключение к интернету.
- Лицензия. Здесь можно посмотреть данные о лицензии, при необходимости отредактировать или удалить эту информацию.
- Шаблон. Выбрать подходящий для моделирования шаблон. Например, для разработки предварительных проектов или городского планирования. Нужны для задания единиц измерения и вида модели. Вы всегда сможете его изменить по ходу работы. Библиотека программы включается в себя более 20 доступных для выбора шаблонов.
Определившись с начальными настройками, можно приступать к работе с программой. Для этого нажмите кнопку «Начать использование SketchUp». После этого появится окно с рабочим пространством.
Справка: чтобы отключить экран приветствия, снимите галочку напротив «Всегда показывать при запуске».
Пропорциональное масштабирование выборки
Если вы хотите изменить размер геометрии в модели и сохранить ее пропорции, вы можете использовать инструмент «Рулетка» или инструмент «Масштаб». Выбор зависит от того, как вы хотите установить масштаб:
- Чтобы масштабировать размер определенной линии, используйте рулетку. Например, вы обнаружите, что одна комната на плане этажа может иметь ширину не более 10 футов, но остальная часть плана этажа может оставаться такой же. Или вы знаете, что статуя должна быть 3 метра в высоту.
- Чтобы изменить размер выделенной области в процентах от исходного размера, используйте инструмент «Масштаб». Например, выберите этот метод, если вы хотите увеличить размер выборки на 200% или уменьшить его до 50%.
Чтобы масштабировать часть вашей модели с помощью рулетки, выполните следующие действия:
- С помощью инструмента Выбрать () выберите объекты, которые нужно масштабировать.
- Щелкните выборку и в появившемся контекстном меню выберите Создать группу.
- Дважды щелкните группу. Вокруг группы появится рамка из пунктирных линий, указывающая, что вы открыли группу, как показано на рисунке.
- Выберите инструмент Рулетка () или нажмите клавишу T.
- Щелкните одну конечную точку контрольной линии. Используйте механизм вывода SketchUp, чтобы выбрать точную конечную точку.
- Щелкните другую конечную точку контрольной линии. Текущее расстояние отображается в поле «Измерения», как показано на рисунке. В этом примере, скажем, вам нужно уменьшить эту ширину до 10 футов из-за проблем на участке, где будет построен план этажа.
- Введите новый размер линии (в этом примере вы вводите 10′) и нажмите клавишу Enter. Этот размер будет использоваться в качестве основы для пропорционального масштабирования вашей модели. SketchUp спросит, хотите ли вы изменить размер группы или компонента.
- Нажмите кнопку Да, и ваша выборка изменится пропорционально. Посмотрите результат на следующем рисунке. Это комната намного меньше.
Примечание. Этот процесс также работает с компонентами. См. Добавление готовых компонентов и динамических компонентов для ознакомления с компонентами. В разделе далее в этой статье объясняется, как масштабирование влияет только на один компонент или все экземпляры компонентов в модели.
Если вы хотите пропорционально масштабировать модель в процентах, инструмент «Масштаб» легко справится с этой задачей. Представьте, что вы не знаете, как поговорить со своим клиентом об уменьшении комнаты на его плане этажа до 10 футов шириной, поэтому вы моделируете слона в комнате, пока обдумываете это. Вот как масштабировать слона или любую другую выборку в вашей модели в процентах:
- С помощью инструмента Выбрать () выберите геометрию, которую нужно масштабировать. Этот шаг важен, если вы хотите масштабировать сложную 3D-выборку. Если у вас простая выборка, например 2D-фигура или объект поверхности, вы можете пропустить этот шаг.
- Выберите инструмент Масштаб () или нажмите клавишу S. Вокруг вашего выбора появится желтая рамка с зелеными ручками, как показано на рисунке. Если вы пропустили шаг 1, щелкните геометрию курсором инструмента «Масштаб».
- Для равномерного масштабирования или сохранения пропорций выборки щелкните угловую ручку масштабирования. Выбранная ручка и противоположная ручка масштабирования становятся красными, как показано на следующем рисунке, а в поле «Измерения» вы видите масштаб 1.00, что означает, что ваша геометрия имеет исходный размер или масштабируется до 100%.
- Переместите курсор, чтобы масштабировать объект. В поле «Измерения» масштаб отображается динамически. Чтобы начать все заново, в любой момент нажмите клавишу Esc. Чтобы установить масштаб из центра, а не из противоположного угла, удерживайте клавишу Ctrl (Windows) или клавишу Option (macOS), перемещая красную ручку угла.
-
Щелкните, чтобы установить новый масштаб вашей выборки. Или введите желаемые размеры шкалы и нажмите Enter.
Примечание. Технически на шаге 5 вы можете ввести размер, например 2 м или 3″, вместо размера в масштабе. Однако масштабирование на основе измерения с помощью рулетки, как правило, более интуитивно понятно.
Understanding how SketchUp for Web features work differently from the desktop version of SketchUp
Right now, here are a few key differences between the way SketchUp for Web and the desktop version of SketchUp work:
- Styles: SketchUp for Web includes many preset styles. However, you cannot edit styles or create your own style templates, as you can in SketchUp for Windows or Mac OS X.
- Materials: SketchUp for Web also includes many preset materials, but you can’t edit or create new materials.
- Keyboard shortcuts: SketchUp for Web shares functionality with your web browser. When familiar SketchUp keyboard shortcuts are in direct conflict with your browser, those shortcuts can’t be used. Don’t worry! We’re working on a way to customize shortcuts within SketchUp for Web. Keep your eyes open for changes.
- Extensions: Extensions are Ruby scripts that add functionality to SketchUp. In SketchUp for Web, extensions currently aren’t available. Because dynamic components also rely on Ruby, this feature isn’t currently available in SketchUp for Web either.
- High-resolution printing: You can print files or download your file in format, but you cannot yet print high-resolution images to scale via SketchUp for Web.
Almost everything about SketchUp is built into the SketchUp for Web. If your favorite feature isn’t there yet, please let us know via the SketchUp for Web (formerly my.SketchUp) user forum.
Note: LayOut and Style Builder, two separate applications that come with a SketchUp Pro license, are not on the SketchUp for Web development schedule.
- shortcuts
- shortcut
- keyboard shortcuts
- keyboard
Обзор интерфейса SketchUp
Когда откроется SketchUp, готовый для начала создания 3D-модели, вы увидите экран, который включает в себя следующее:
Строка заголовка
Строка заголовка содержит стандартные элементы управления окном (закрыть, свернуть и развернуть) и имя открытого файла. При запуске SketchUp открытый файл имеет имя «Без названия», что означает, что вы еще не сохранили свою работу.
Панель меню
Большинство инструментов, команд и настроек SketchUp доступны в меню на панели меню. Это такие меню, как SketchUp (только Mac), «Файл», «Редактирование», «Просмотр», «Камера», «Рисование», «Инструменты», «Окно» и «Справка».
Панель инструментов «Начало работы»
Когда вы начинаете использовать SketchUp, панель инструментов «Начало работы» отображается по умолчанию. Она содержит основные инструменты, необходимые для создания 3D-моделей.
Чтобы отобразить дополнительные панели инструментов, выберите Просмотр > Панели инструментов. В открывшемся диалоговом окне «Панели инструментов» выберите панели инструментов, которые хотите отобразить, и нажмите «Закрыть». В macOS вы можете отображать панели инструментов, выбрав Просмотр > Панели инструментов. (Дополнительные сведения о панелях инструментов и их настройке см. в разделе Настройка SketchUp Справочного центра.)
Совет. Эта статья познакомит вас с несколькими основными инструментами. По мере того, как вы продолжите изучать процесс создания 3D-моделей в SketchUp, инструктор научит вас (или напомнит), как использовать каждый инструмент. Дополнительные сведения см. в разделе .
Область рисования
Область рисования — это место, где вы создаете свою модель. Трехмерное пространство области рисования визуально определяется осями рисования, которые позволяют чувствовать направления в трехмерном пространстве во время работы.
Область рисования также может содержать простую модель человека, чтобы дать вам ощущение трехмерного пространства.
Строка состояния
Когда вы начинаете работу со SketchUp, двумя важными элементами в строке состояния являются советы посередине и поле «Измерения» справа:
- Советы по использованию инструментов. В средней части строки состояния щелкните значок вопросительного знака, чтобы отобразить окно Инструктора, в котором представлена основная информация об использовании инструмента, выбранного на панели инструментов. В средней области также отображается краткое описание по использованию выбранного инструмента. Эта область полезна, если вы не знаете, как работает инструмент.
- Поле «Измерения». Это поле является важным инструментом для создания точных моделей. В нем отображаются размеры по мере рисования. Вы также можете использовать это поле для управления выбранными объектами (например, для создания линии определенной длины) или для создания равномерно распределенных копий объектов (например, столбов, ограждений или жилых блоков в постиндустриальной антиутопии).
Совет. Поле «Измерения» исчезло? Наиболее вероятная причина в том, что размер окна SketchUp больше доступной области просмотра экрана. Чтобы восстановить вид окна «Измерения», нажмите кнопку «Развернуть» в строке заголовка.
Если вы являетесь пользователем Windows и включили параметр «Автоматически скрывать панель задач», поле «Измерения» может скрыться за панелью задач при ее отображении. В этом случае поле «Измерения» снова появляется, когда вы закончите использовать панель задач.
Примечание. В левой части строки состояния вы найдете кнопки для геолокации и получения кредита. Эти параметры помогут вам работать с расширенными функциями SketchUp, которые выходят за рамки данной статьи.
Панели по умолчанию
В правой части экрана вы видите область панелей, включая «Инструктор», «Материалы», «Стили» и т. д. Область по умолчанию появляется при открытии SketchUp, но вы можете закрыть область панелей по умолчанию, нажав кнопку «Закрыть» в правом верхнем углу. Переключите область, чтобы отобразить или скрыть ее, в подменю Окно > Область по умолчанию.
В правой части экрана вы видите область панелей, включая «Инструктор», «Материалы», «Стили» и т. д. Область по умолчанию появляется при открытии SketchUp, но вы можете закрыть любую область, нажав ее кнопку «Закрыть». Чтобы повторно открыть область, выберите ее в меню «Окно».
Finding and using an extension after it’s installed
After you install an extension, how do you use it in SketchUp?
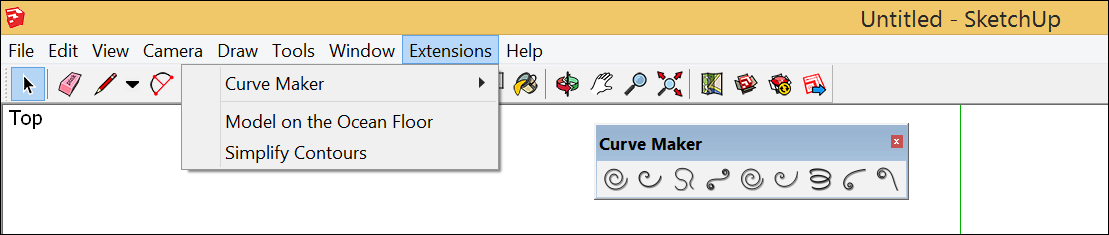
Sometimes, an extension appears on an Extensions menu, as shown in the following figure. Simply select an extension from the menu to start using it. The extension may also add a toolbar for using the extension’s features, such as the Curve Maker toolbar shown in the figure. Other times, an extension is on the Draw menu, the Tools menu, or a context menu.
Tip: For details about how to use an extension, read the extension’s documentation, which you can find on or via the extension’s details page. For example, the extension details page might include a video, instructions, or links to more documentation about how the extension works. If you have a question, check out the reviews from other users (also on the extension details page) or check whether the developer provides contact information via the details page, their profile, or their website.
- Extension Warehouse
- installing extensions
- plugin
- extensions
- plugins
- extension
- install extension
Stretching or squishing geometry to scale
Sometimes, you need to scale only one dimension of a model (or maybe two). To do so, use the Scale tool’s edge or face grips. Here’s how the process works, using a cabinet as an example:
- With the Select tool (), select the geometry you want to scale. This step is important for a complex a 3D selection. Skip this step for an easy selection, like a 2D shape or a surface entity.
- Select the Scale tool () or press the S key. A yellow box with green grips appears around your selection. If you skipped Step 1, click the geometry with the Scale tool cursor.
- Click an edge or face grip (not a corner grip). The selected grip and the opposite scaling grip turn red, as shown in the figure, and in the Measurements box, you see a scale of 1.00, which means your geometry is at its original size, or scaled to 100%. The Measurements box also displays the axis direction for your scale, such as Blue Scale or Red Scale. If you select an edge grip, you see two axes, such as Red, Green Scale.
- Move the cursor to scale the entity. The Measurements box displays the scale dynamically. Press the Esc key at any point to start over. To set the scale from the center instead of the opposite edge or face, tap the Ctrl key (Windows) or the Option key (macOS) to toggle this functionality while you move the red corner grip.
- Click to set your selection’s new scale. Or type the desired scale dimensions, and press Enter. To set the scale on two or even three axes, type two or three numbers, each separated by a comma, such as 3,2. In this example, you see the original cabinet was scaled to be twice as wide but half the height.
Tip: If you have trouble controlling the scale direction, try repositioning the drawing axes to your selection. To do so, select Tools > Axes from the menu bar. With the Axes tool cursor, click corner you want to use to align the drawing axes. Then move the cursor so that it snaps the edge to which you want to align your inferred axis and click to confirm the change. (The inference is red, green, or blue depending on the direction you move your cursor.) See Adjusting the Drawing Axes for details about working with the drawing axes.
How to Install Sketchup Plugins
- Once you’ve downloaded a .rb file from the interwebs save it to where sketchup can find it. By default that location is your Sketchup/Tools folder. In older versions of sketchup you’ll need to use your Sketchup/Plugins folder.
- After your file is in that folder, close and restart Sketchup.
- When you reopen sketchup your plugin will initialize. Depending on the plugin, using it’s functions may vary. Consult the author if you have trouble finding out how to use your plugin. A couple common places it might show up is in the new ‘Plugin’ tab at the top of your program or in the menu you get from r-clicking on objects.
Trying or purchasing extensions in the Extension Warehouse
Whether you’re signed in to the Extension Warehouse through your browser or SketchUp, you can purchase an extension. However, to install a trial or purchased extension, you need to be signed in to the Extension Warehouse via SketchUp.
The following steps walk you through making a purchase:
- On the extension details page, click the Purchase button. (If you can download a trial before you buy, you see an Install Trial from SketchUp link. To install a trial, see the upcoming steps for installing a trial or purchase.)
- When prompted, enter your billing and payment information. Billing information is required to verify your credit card. Your receipt is emailed to the email address you use to sign in to Extension Warehouse. If you don’t receive a receipt email shortly after your purchase is complete, check your spam folder.
Tip: After you purchase an extension, the Extension Warehouse doesn’t offer refunds. If you’d like to try out an extension before you purchase it, look for an Install Trial button, which enables you to try how the extension works before you buy it. If you’re having trouble purchasing an extension or would like to contact us about an Extension Warehouse purchase you’ve made, fill out our Customer Service Contact form and, from the You Would Like To drop-down list, select Resolve a Purchasing Issue.
To install a trial or purchased extension, follow these steps:
- In SketchUp, select Extension > Extension Warehouse and sign in to the Extension Warehouse.
- To install a trial, search for the extension you want to try, and on the extension details page, click Install Trial. If you’ve already purchased an extension, skip to Step 3.
- From the user menu, select My Extensions.
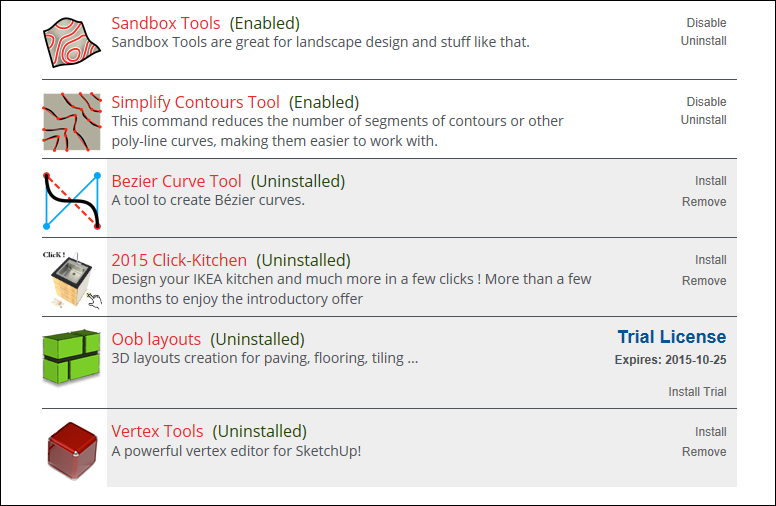
- On the My Extensions tab, scroll down to the trial extension or the purchased extension that you want to install and click the Install Trial or Install link. In the following figure, you see an Install Trial link.
- When SketchUp asks whether you trust the author and want to continue installing the extension, you need to click Yes to proceed. After a few moments, a dialog box confirms that your extension was installed.
Replacing one material with another
Because SketchUp enables you to replace one material with another, you can experiment with materials quickly and easily. In a kitchen, preview different countertop materials, such as black granite, blue tile, and white composite. If you’re picking out house paint colors, compare yellow siding and dark green trim with navy siding and cream trim. When you know the keyboard modifiers, the process is a cinch. Check them out in the following table.
| To Replace One Material with Another … | Modifier Key (Microsoft Windows) | Modifier Key (macOS) |
|---|---|---|
| On adjacent faces | Ctrl | Option |
| On all faces in the current context (for example, the same group or component) | Shift | Shift |
| On all connected faces | Ctrl+Shift | Option+Shift |
Note that all of these modifiers behave as toggles which will stay persistent until they’re toggled back off. For example, tap the Shift key to toggle the «On all Faces in the current context» functionality, perform your operations, then tap Shift again to toggle it back off.
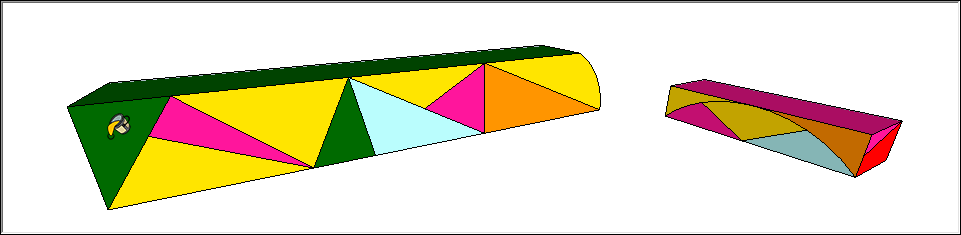
Here’s an example help you visualize how each shortcut works. Say you’re trying to figure out the colors for an abstract mural on two separate walls. The following figure shows the mural mocked up with materials from the Colors-Named collection.
To see how replacing the red with green might look, select the Paint Bucket tool and then select a green from the Materials panel (Microsoft Windows) or Colors panel (macOS). If you Ctrl- or Option-click the red triangle in the upper left, only the adjacent faces with the red material are replaced with green, as shown in the following figure.
If you Shift-click instead, all the red faces become green:

But if you Ctrl+Shift-click or Option+Shift-click, the red faces turn green only on the left wall:
Opening from and downloading to your computer
If you prefer to work with SketchUp files stored locally on your computer, this is possible in SketchUp for Web.
Opening local files
To open SketchUp model stored on your computer, follow these steps:
- Go to the Home tab, by clicking the ‘hamburger’ menu icon in the very top left of your screen. (The Home tab is also the first screen that loads when you start up SketchUp for Web).
- Click the Open button, and select ‘My computer’
- Navigate and select to your desired file. Click ‘Open’
With this method, your model will load into SketchUp for Web as a temporary file. Until you click ‘Save’, your file will not be uploaded to Trimble Connect. If you don’t want to save your model in Connect, follow the instructions below to back to your device.
Tip: Another way to add models is to go to the Trimble Connect tab and simply drag/drop a file from your computer. You can also use the Add model button. Either way, your file will upload and display as selected. From here, all your modeling progress on this file will be saved in Trimble Connect. You can download the file back to your device at any time.
Downloading files
If you need a copy of your SketchUp file — or prefer to save and store your files locally — you can always download the model you are working on to your computer. Follow these steps:
- Make sure the model you want to download is loaded in the modeling window.
- Open the file operations menu at the top of your screen
- Select the ‘Download’ command. You’ll be prompted to choose a SKP version to download. If you plan to re-upload your model to SketchUp for Web, you can choose any version. If you want to use your file in a desktop version of SketchUp, you’ll want to pick a version that corresponds to that desktop version.
- Click OK to download your model.
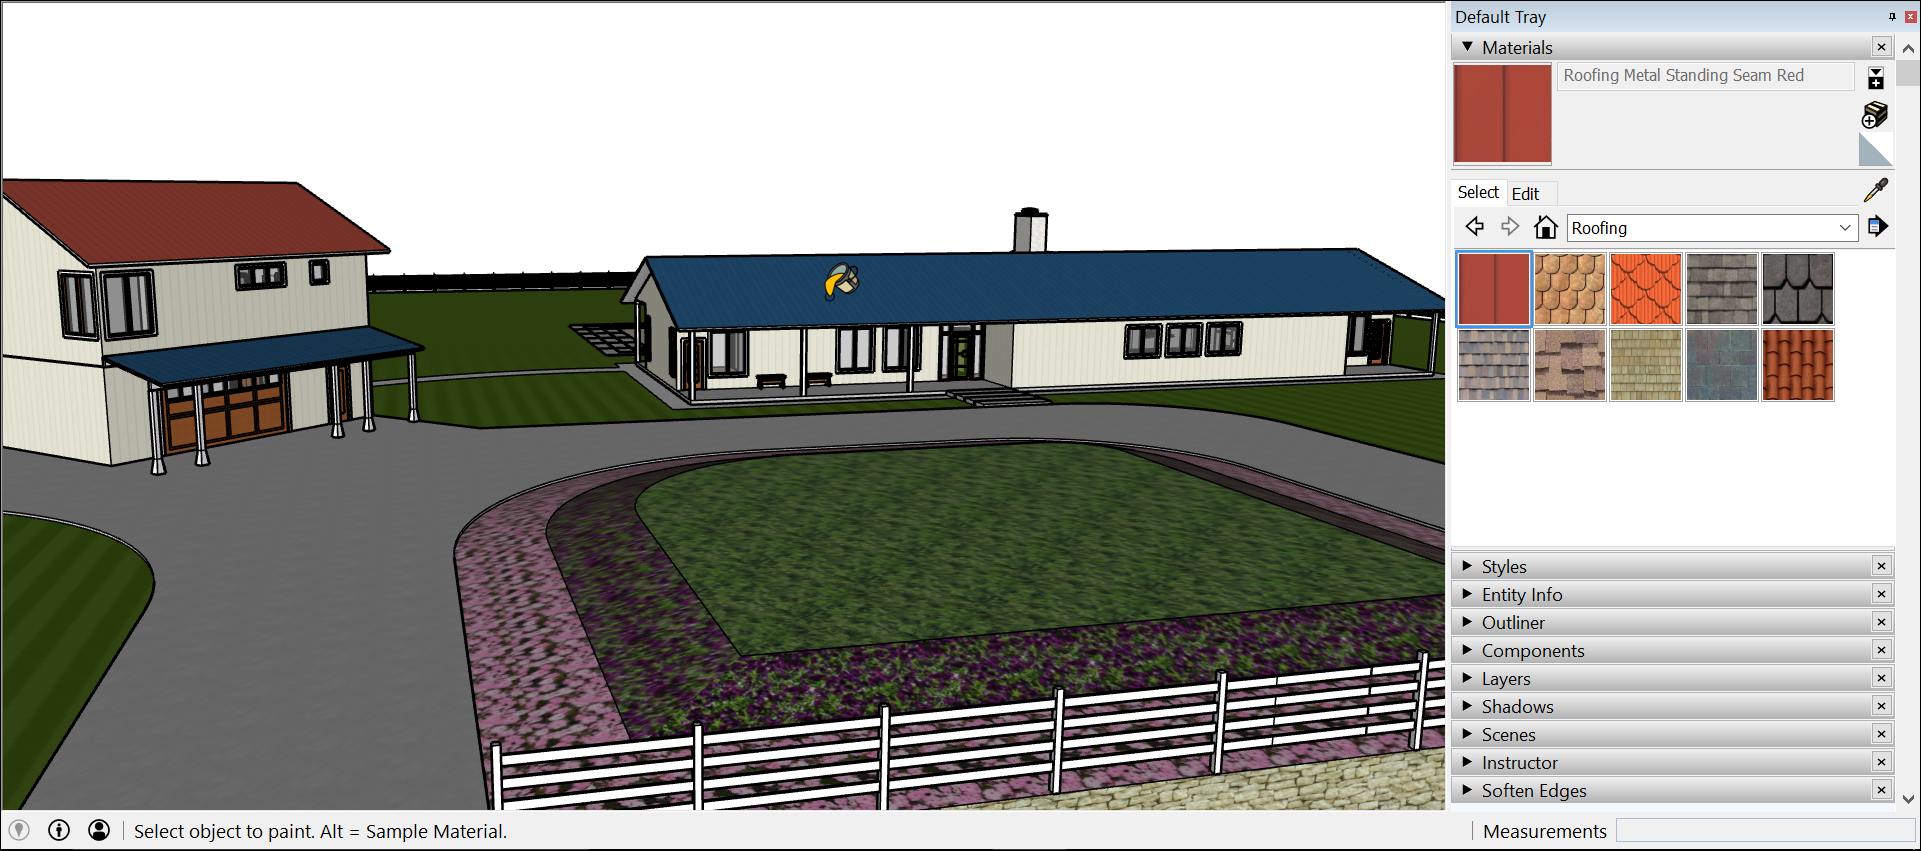
Applying materials
Applying materials to your model is pretty simple: Select a face or faces and then select your desired material. If you’re painting groups or components, check out the tips at the end of this section, which can make applying materials even easier.
You apply materials to your model with the Paint Bucket tool (), which you find in the following parts of SketchUp’s interface:
Windows
- Getting Started toolbar
- Large Tool Set toolbar
- Principal toolbar
- Tools > Paint Bucket on the menu bar
To start applying materials to your model, follow these steps:
- Select the Paint Bucket tool ().
- In the Materials panel that opens, click the Select tab. If the Materials panel does not open in the tray, the dialog box may be in a hidden tray. In this case, hover your cursor over the hidden tray tab. This will expand the tray. You can then open the Materials panel in the tray.
- From the drop-down list, select a materials collection.
-
Click the material you want to use.
Tip: To sample a material that’s already in your model, tap the Alt key to switch temporarily to a Sample tool. With the Sample tool’s eyedropper cursor, click the face whose material you want to sample. Once you click a material to sample, the Paint Bucket will return to it’s default state with your sampled material active. If you prefer, you can press and hold the Sample modifier key, to keep the Sample tool active until you release the key.
- Back in the drawing area, click a face or faces to apply the material.